Assignment Task 2

-Scene Analysis-

Movie <Collective Intention>, 2015, directed by Oh-Kwang Kwon

Movie Trailer:

The movie is about the main character Gu who becomes a half-man, half-fish after a participation in testing for big pharmaceutical company Ganmi Medical goes disastrously awry when he sprouts scales, webbed hands and a fish’s head. After Gu’s transformation to a ‘Fishman’, the movie described his journey from fame and peak merchandising potential until being spurned by the society.

Scene chose(from 47:25 ~ 50:05):

Instead of choosing a new movie I haven’t seen before, I chose a movie I have seen but didn’t focus too much on its cinematography, the only thing I remember was the colour tone was grey and gloomy overall. After studying this course, I noticed a lot more than the first time I watched this movie.

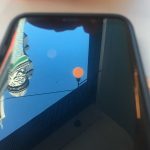
(First shot of this scene – wide shot)

The chosen scene was about the main character Gu’s journey of a ‘fish-man’ has passed the peak, negative voices gradually spread out in the society, he was even framed as ‘jerked off’ in front of a married woman. Overall, this scene is much darker than the other scene in throughout the movie with a cool tone(purple and blue), if we look at the first shot of this scene, we can hardly see the actor’s side face, the lightest light source came from the ceiling where we see the reflection on the old man’s forehead and the actor’s nose sitting on the left. There are two key light sources I can see in from the first shot, ceiling light and light source outside the window. They are both very soft but I can tell the key lighting is the light on the ceiling. However, even the light sources in this scene are very soft and grey, but the details can still be seen in each shot especially in character’s mid close-up.


(Character close-up )

As is shown in the first shot, the key light source is above where the actor stands. there isn’t any light source close to where the camera is set because of the fish-man Gu’s side face has no filled lighting in the wide shot. However, when I rewind to watch the scene for multiple times, I discovered there is actually another light source in this scene but it’s very soft and adjusted in the same cool colour tone which the audience never realised. There were two clues where I discovered the extra light source, firstly, the direction of the key light source has changed. If there isn’t any extra light source, the area close to where the camera is set including Gu’s left face would be in the dark as is shown in the wide shot, the light source came from the ceiling is being reflected on the old man’s forehead. However, when we look at Gu’s mid close-up shot, we can see his left face is lit up with soft light but is much lighter than the wide shot, details are shown including Gu’s fish scale.

Secondly, I can also tell there is the extra light source used in this scene, in the wide shot, the door behind the actor who is standing has no lighting whereas in the character’s mid close-up I can see light reflected on the door behind him above the television. The actor’s both shoulder is lit up in the close-up whereas his left shoulder is shaded by the wide shot.


Week 4 – Class Reflection

Group 2(Jacky, Aria, Dan, Brews, Sylvia, Rachel, Kris) – Exercise 3; 5(scene 7)

I think the purpose of exercise 3 is two actually apply what we have learnt so far on lighting into an actual scene. Secondly, by manipulating camera, lighting and sounds etc. learn to connect two shots together that was completely filmed in different places. Lastly, get everyone to get used to working in a team and be familiar with how to deal with unexpected problems during shooting.

Time controlling issue. We all know in an actual filming schedule, time controlling is another key issue that actually exists in a lot of producing team. We shot the exercise 3 externally until 12 o’clock, which left 10 minutes only for exercise 5 when we completed to set up for exercise 5. It is always unexpectable issues happening during the progression, we cannot avoid them coming, something a production team need is collaboration. Collaborate well will allow us to solve a problem as soon as it appears, and this is another challenge we have faced in today’s exercise. Everyone has their own way to film, different thoughts and idea even we are looking at the same script, we are very unused and not even familiar with each other, collaborating to film within a short period of time is actually a challenge to most of us.

Moreover, things usually don’t end up to be what we have expected it to be, for example, since there is a large number of unexpectable things happening during the process so director/ producer need a storyboard before and during shooting. This challenge is what always exist for me, why I have used a storyboard, but things are still continuing and non-stoped changing. For example, Brews is the director of exercise 3, he has decided where he wanted to shoot before class and he went to the spot already.

Reflection as a camera person:

Light management is another challenge for us. Under my understanding, a camera manipulator supposed to use their knowledge on camera to assist what the director wants. Brews was the director of this scene, he went to the shooting location before Monday. However, the lighting was much stronger than want he was expecting from this location, where he was planned to let the two actors sit was facing directly to the sun. I have tried to adjust the aperture to avoid the overexposed, but since the lighting is too hard that directed towards the actors’ face which we cannot control by manipulating the camera. We ended up to choose somewhere that didn’t have sun directed with softer lightings to complete this scene.

Overall, I really like this exercise because this exercise has brought me back to experience what is like to film and work in a production team. The two studios I have chosen last year was 80% individual exercise, it’s been a long time since my last team production.

WEEK 3 class reflection

– Week 3 class – 

I am not sure if I am the only one who felt this way, I love photography and I carry my camera along with me most of the time, I understand what each technical terms mean but when we say for example: ‘ the longer the focal length, the shallower the depth of field’ this sentence always took me ages to get my head around. I don’t know if it’s the language problem or is it just I wasn’t familiar enough with the terms. To make sure I can understand what we have learnt so far, I have discovered an effective strategy to understand all those rules. I need my camera out, for example, ‘the longer the focal length’ I will set my camera at 35 mm and take a photo to compare with the 18mm focal length.

 – Class Exercise 2 – 

I used to hate standing in front of a camera and act no matter for what reason, I understand that we are taking turns to act or to control the camera as we are students. What Robin said in this class really gave me a huge impact, he first said that as media makers we might not have a lot of chance to ‘act’ in front of the camera in the future, so is really a good opportunity to experience as an actor. I applied this during our exercise, I imagined what I will adjust the camera if I am manipulating the camera. As the result, we completed this exercise in a short time, we cooperated very well which myself will determine where should I stand for each rule, the other two camera people will double check from the camera and adjust the three factors (focal length; lens aperture; distance the lens focused).


– Daily observation on lightings – 


Observation 1 – This is the second floor of my house, the windows are facing the west which made my house look amazing at sunsets. I took a lot of photographs during sunsets, and I am starting to record this moment with short video clips either. Before I participate in this course, I didn’t realise I have focused on lightings a lot more than I thought in my photographs, but as Robin said: “If there is an exposure, then there are lightings in this piece”.

In the second shot in the video above is sunlight from my bathroom window at sunset, the window has a frosted glass that makes the amount of light came through seemed to be softer than the amount of light that came through an ordinary window glass in my bedroom. The sunlight  in my house reminded me Robin’s demonstration in class when Robin put on the gel ND filter, the light seemed to be softer with the gel filter, so I was pretty sure that the frosted window glass worked the same way as the ND filter because they both seemed to change the quality of light — made it softer.

However, in order to make sure that I didn’t misunderstand this two cases, I still asked Robin for a correct answer. The fact is that I did misunderstand these two cases, the light can seem to be softer only because the gel ND filter has reduced the volume of light, but it doesn’t actually change the quality of light. Whereas in the case of my bathroom window, the frosted glass window did change the quality of light, it has made the light softer.

Observation 2 – There is a small room at first floor where we used to storage drinks, the window is facing the same direction as the two windows we mentioned on the second floor, the window glass is also been frosted. I really like to take photographs especially selfies, girls will know sunlight is extremely helpful for selfies. The sunlight always comes through soft, and since the sunlight comes from a high angle so it seems highlighting the subject’s facial expression. Here are some examples my friend took for me with an instant film camera. 

Since the lighting comes from the window on the top of the room so the line which divides the sunlight and shadow is lining on my shoulder, if I will consider using this place with this lighting in a movie, I think the sunlight suits a lot of different type of film but I think the sunlight can highlight the subject’s facial expression, even the subject isn’t a person I think it can also use to highlight the key element in a scene.

Weekly Reflection – week 2

– Monday Class – 

Through experience in groups, I got to know how lighting can really change the feeling/ emotion of a piece of media. We spent a long time to decide where the interviewee should sit, how to use the reflector and whether to use white or black one.

In the first shot, we place the white reflector on the left of the interviewee, which is letting the light source from the window bounce back to the subject’s face. Moving on to the second shot, we used two reflectors, both black and white reflect board. Since there is another window at subject’s right-hand corner, the light still came through. We used a black reflector to block interviewee’s left right side but we thought this is making the subject too dark, so we used a white reflector at the bottom of interviewee’s face let the light source from the window bounce back to interviewee’s face.

The first shot had a warm colour tone, the second shot was in a cold tone since we have brought the black reflector to block the light from the back corner. Other than the colour tone, using a black reflector to create shadow made my face looked smaller, the shadow helped to distinct my facial features because of the white reflector at the bottom reflect light on the other side of my face. Moreover, using reflectors also helped to express emotion to the audience. We didn’t turn the volume up when we rewound to select the best one, the first one with the warm tone seemed to be more cheerful, whereas the second tone with black reflector seemed sombre.

It was an amazing experience done by ourselves, I really like the way how we got chance to watch how Robin adjusts the lighting but also get a chance to play with the lighting ourselves.

– 1st –

– 2nd –

– Wednesday Class – 

From the first part of today’s class, the scene from the film ‘In the City of Sylvia’ really impressed me. Every single shot was so well considered and organised, the lightings were done in detailed, the choice of focal point and depth of field, everything was arranged deliberately. I am going to download the film and watch over the weekend, the details in the short clip really surprised me.

In today’s class, we spent most of our time on a lighting set-up practice, we had one key lighting, tried out different ways of fill lighting and also backlight from the top. Throughout the practice, I kept considering why are things different when we see from the camera to human eyes.

When I see through a camera lens, my first feeling was, I light what I see with naked eyes better. Secondly, the subject seemed to have a higher contrast than naked eyes, the key lighting look harder in the camera than our naked eyes. I was considering this is because a camera is more sensitive to light sources, so it caught the key light more accurately than a human eye. Moreover, I thought another reason that makes the subject seemed softer with naked eyes was that our eyes were being affected by other light sources in the classroom, whereas the camera sensed the key light as the strongest light source. At last, Robin explained the purpose of this exercise. It’s actually a further extension of week 1 class, what we see with our naked eyes is different to what we will see from a camera. So if I want to get the same lighting as what I saw with my eyes, that’s when we need lighting, lighting will be the best tool to help us represent what we want.


Assignment 1 descriptive writing

– Movie – 

Film <Angels Wear White>

This film was directed by Vivian Qu released in December 2017,

it’s about two teenage girls one has experienced sexual abuse and the other has witnessed the fact.

The film has shown the victim’s attitude after the heartbroken accident,

how hopeless and lonely she feels when her mother doesn’t believe her.

The scene I have chosen is after main character Mia has experienced sexual abuse, her mother didn’t even comfort or understand her but blamed Mia for wearing short skirts and pretty dresses. This hurts Mia’s heart very much, so Mia has left home and went to find her father who lives far away to where she lives. The lighting when Mia is at the gate calling ‘Dad!’ is a very soft lighting, even there is a lamp lighting from the inside of the gate, but the light isn’t straight on her face which I am guessing the lighting here means Mia is looking for the last hope who can help her, but since her parents have divorced when she was very young. Mia doesn’t know how would her father react when he sees her, the possibility is very small so the lighting is soft and gloomy.

Overall, the whole movie has rarely used a hard lit, especially in this clip. The lightings in the whole scene are in the same colour tone, colour yellow and in a grey tone from an over face lamp. These sets of lighting, either from over face or the colour are making Mia, the main character seemed to be more powerless and helpless, and also helped the audience to feel Mia’s situation more appropriately.

– Painting – 


Edward Hopper

<Girl at a sewing machine>

I have chosen Hopper’s “Girl at a sewing machine” because it has reminded me of our first class exercise, our group has placed the interviewee beside the window. The painting seemed to have soft light, but the sunlight on the orange wall is hard lit. When I really let myself into this painting for a while I found the painting very unrealistic and I cannot stop myself to imagine this scene in a real situation. I was comparing this image with my limited experience in lighting,  different to our first class exercise, the window is right in front of the subject not beside the subject, which I am guessing the light maybe harder on her face, the white fabrics will reflect the light makes her face even brighter.Comparing to our class exercise, we had soft light on the background, but hard light on the right side of her face. The girl in this facing towards the window so I imagine her face will have harder lighting in a real situation. I have also noticed the main colour tone is warm orange in this painting, the biggest colour pattern is the orange wall, but the wooden furniture is also enhancing the warm tone.

Weekly reflection – week 1

Base on the movies; dramas or in different media pieces I have seen, I have a clear idea that lighting plays an important role in most of the media piece. I am a photography lover, I carried my camera around a lot in my free time, which I am pretty sure that lighting in photography is a key element because it changes the atmosphere of a photograph. I remembered Robin has highlighted a point in both classes in our first week: there is always some lighting if you have exposure, there must be lightings. However, even though I know how important lighting is in any media productions, I didn’t really have a chance to really learn what is lighting, and how does lighting work effectively in a media production. This is one of the main reason that made me choose to participate in this course.

My aspiration for this semester first is to gain a basic understanding of lighting. Secondly, I want myself to get used to thinking about lighting no matter what I saw, I remembered in Media 1 my tutor reminded us that even we are just media students, it’s time to start to think as a media maker, and we need to get used to think as a media maker.  Furthermore, I wish what I will learn from this course can apply in my future career, based on my experience so far, I always have no idea how can I adjust the lights in my previous studio projects. Throughout this studio, I hope I will at least able adjust the lighting for my own work.

Exercise 1 review:

I actually do like the lighting of our group, the lighting of our interview was harder than rest of the groups because we let the interviewee sit right next to the window. Half of Yolanda’s face was overexposed because she sits next to the window, the hard lighting made our lighting slightly overexposed. Another thing that found interesting was most of us thought black and white look nicer than coloured, since the space was very limited so we didn’t really get any choice on choosing where to shoot at. When the subjects in a frame/ scene are looking too messy or complex, turn it into black and white will make the scene look way much better.

One thing I have learnt in the first class is natural lighting keep changes every single second. For example, if we are shooting a huge scene for the whole afternoon we will get different lighting. In order to avoid this happening and also to keep the continuity, we need to let lighting elaborate in media production. Something I would consider to change: if we can have a better choice of background I think I will let my interviewee being filmed at a simpler background, maybe with a single colour background. Second, I will move my interviewee to not sit too close to the window to avoid overexposure.


WEEK 13 – Purple

Purple – Joyful

Purple, is a colour that I don’t really look at very often, the only thing I have with colour purple was the movie ‘InsideOut’ where purple was a character of fear. In order to get inspired, I went on Instagram and typed in purple to see what photos were tagged in photos, what are these photos’ common point. After browsing hundreds of purple tagged photographs I have written down a list of words that I will use to describe purple:

  • strong
  • darkness
  • powerful
  • dark power
  • the dark side
  • stillness
  • hush
  • mysteriousness


This place is designed as a study area, a place for chatting and gathering I guess, anyway it is not designed for shooting. To film in this location is already challenging the designer’s intention, and I think this is another constancy since every location I chose to film was not for designed for photographers to film or shoot initially.

After research and survey, I used purple to represent joy and a sense of delight.  I remember near our classroom where it was colored in purple, lavender purple, and red, I will use both of the purples for the background. I am not sure if it’s only me or everyone has the same feeling that purple gives people a sense of stillness, it looks so powerful and mysterious. What is the opposite to stillness? of course, the answer is movements, I am not meaning crazy dance moves but slightly moving hands; nodding heads or swinging arms to highlight the sense of joy and delight.

I filmed this colour for twice because, at the first time, I can see joyful from the colour but the sense of stillness was still very strong. While editing the first version, I was also considering what are the ways that can help me remove the sense of stillness but also represent the sense of joyful. The changes I am going to make for the second shooting is first, use a brighter light on the character or the parts that I want the audience to focus at. Secondly, add more movements in.

Media:


Final Reflection

-Task four Reflection-

When I have finished filming the four different colours footage, I wasn’t sure whether I should go for the fifth or I am satisfied with these four clips as a series. Might be influenced by my cultural background or personal experiences, for somehow, I thought any series or a set should contain five different pieces, so at the planning stage, I was preparing to shoot for five different clips to form a series. However, a plan can never catch up with changes, I was satisfied when I finished the fourth colour footages, so I asked help from Hannah. Hannah said she thinks four should also be fine for a series because no one said a series have to contain five pieces though, and she emphasized that I would rather have four polished videos than filming the fifth video. Which there I go, ended up with the fourth colour.  

This final project has well demonstrated either creatively or technically to noticing because the four locations that I chose to film are the places that we might have passed by every day, we might or might not have seen them, but they are never highlighted to be a location for a media production.  By choosing these unnoticeable four places I have highlighted the objective of the course_to notice, and by using selecting these areas to film, I have responded to my final project’s objective_to challenge a subject’s initial purpose.

My project has well demonstrated either creatively or technically to noticing as a media idea inform. Because just like what we have spoken about in the class, we are the ones who construct the world to be but we still missed out a lot of small things in our everyday life, so my project is using the ones we might have missed out daily. Moreover, even though humans are the ones who create the world, but there isn’t a rule saying that everything must contain a meaning because everything can be interpreted in a different way depending on the audience’s experience. People are so obsessed to a definition, like a movie or artwork that you don’t understand, many people will see this as a bad movie or artwork.

-Studio Final Reflection-

Looking back to the start of the semester now, participate in ‘seeing the unseen’ is such a captivating elective for me. I believe I am not the only one who has tuned myself to notice everything in our surrounding, since the beginning of the course the question I have been asking myself is: what can you notice hear or what haven’t you noticed here? And of course, I am not saying this is something wrong because I think as media makers, we need to have this skills to produce good stuff.

I am in media 4, this is my first studio which we really try to extend the same concept from the first task towards the final project. In the progression of each task, I have met difficulties at the end of each task because I don’t know how can I extend any further on a topic. For example, when I complete task three, I have considered for a week time on what should I talk about in the pitch because I have no idea where can I extend further on colours. I remembered a reading at the start of the semester saying sometimes our mind is being blocked by the large things we care about in our life so we haven’t left any room for the small things. I forced myself to not pay too much attention to the large things, in the case of assignment three, I divert my attention from colours to the meanings behind, and I have also get myself to listen carefully during class discussion even it’s not about my project.

Learning to notice is helping media makers to not miss out every tiny thing in our surroundings, other than completing works for my project, I have also collected many amazing ‘noticing’ pieces that I am still doing even I have completed the final project (see media below).

These are just a small part of my daily collection, and they are all captured with my phone, whenever I took my phone out and captured all these details I noticed that I had tuned myself after participated in this studio. Because my project is always about colours, so these photos are commonly about colours as well, with all this photographs and videos I made through the course, I love to watch them over and over again, and I guess most directors will have the same feeling with me.


Week 12 progression – Yellow

Class Discussion:

Last Class!! I am glad that I have come to this class because this was the last time I can get feedbacks from everyone in this class, and the feedbacks I have received from this class were quite helpful for my further progression. Overall of the edited and non-edited video footages, I felt most satisfied with the Pink video clip, I was not quite sure whether the green does create an opposite meaning with a particular subject, so I have shown the video to the class.

Since we have different cultural background, Hannah has pointed out green can also mean uncomfortable or unwell to them. So she suggested me to add another shot at the beginning to let viewers expect at the beginning of the clip. Although I have to use the hand gesture at the beginning because I want to keep the constancy happening at the very beginning of each video, I might add a shot of real trees and leaves after the shot of hands but before the audience get to see the character’s face.  The next time if I feel the location needs to be brighter, I will use an LED light covering with cellophane papers. This way can help me to soften the sharp white colour from the light but match with the location at the same time. Most important of all is that this way of lighting worked very well in the Pink version.


(Orange)Yellow – fear

The inspiration for colour yellow has come from an advertisement that played before a YouTube video, I can’t even remember what was it advertising for, but I still remember the narrator used a delighted voice saying: ‘yellow is such a happy colour.’ Yellow is such a bright, vivid and eye-catching colour. Usually, we can see it used for a logo or a sign, use it to emphasize something like a highlighter for example. However, we don’t often see yellow to be used to represent something negative. According to the survey on colours, almost half of them associate yellow with lemon or fresh, these two were the most frequent answers I received. As a result, I have decided to use yellow to represent fear.

The reason my final video end up to have an orange background because I haven’t found the kind of yellow colour that I want, the yellow I saw these days were very soft, I did test shooting with the pale yellow colour but I wasn’t satisfied, I want the colour to be very eye-catching. One day,  when I went to the toilet at level 1 building 10, the wall in the toilet was in bright orange which stood out from rest of my day. I guess it’s because of the wall outside the toilet was black and white which have to make the orange to look even brighter, but anyway, I have decided to use orange, the colour that combines the freshness from yellow and the warmness from red as well.

Filming: 

I have used an orange soft light filter to cover the sharp white light, but it was too orange that almost became the same colour as the orange background, so I have layered one more yellow cellophane paper to bring out the yellow colour. And that’s what I want:)


Media:


Skip to toolbar