Student Fictional Film – Coffee & π

As a part of RMIT’s Film TV 1 specialization, a group of students and myself produced a short, fictional film. The course criteria required our team to complete all of the filming in one day. This proved to be a challenging task, however it encouraged our team to be highly organized and focused on the day of shooting.


Here is our story idea for the romantic comedy titled ‘Coffee and π’, written by Evan Paris:

Adrian, a socially awkward mathematician, is a regular at a local cafe. Adrian, quite literally, sees the world through numbers, and can produce calculations for life itself. But when a girl enters the equation, human error becomes a major problem, and the theories he creates cannot work.


The finished film, ‘Coffee and π’ was shown at RMIT’s end of semester screening.

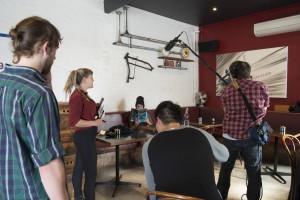
The crew on shoot day

The crew – shoot day

Analysis/ Reflection 6 ‘Premier shortcuts’

There are various keyboard shortcuts that can be utilized for your efficiency in Adobe Premier. Here are some that I have sourced that should come in handy when I am editing:

Apply Video Transition – Cmd+D (Mac OS)

Apply Audio Transition – Shift+Cmd+D


However, the most useful tips I have found in my practice so far is the shortcut of marking in and out, as below:

Mark in – I

Mark Out – O

Analysis/ Reflection 6 ‘Blood Simple’

Certain audio and visual editing techniques are notable in the excerpt of Blood Simple (1984, Coen Brothers, USA). The audio is cut over the video with the editing technique called a ‘J cut’. This is done to show the actor’s reactions when another actor is talking.

In the sound-scape you can hear mosquitoes buzzing as well as a humming sound found within the room. Additionally, certain items are of a focal sound – drawing attention to the central characters and props such as an envelope. This allows for effective continuity within the sequence of scenes.

Analysis/ refection 6 – ‘shooting on the day’

Guest lecturer, Sandra spoke to the Film-TV 1 students about the production of our short films as well as some strategies for the shoot day or in Sandra’s words “Learning how to be smart as soon as possible to get things done on the day of shooting”. Sandra provided the room with some insights into how to direct actors. Sandra told that when directing actors it is important not to hurt their confidence or to offend their acting abilities. Sandra spoke about how it’s often not the actor’s technique that is wrong, it is just that the actor and the director have different expectations of what they want from a scene or character. Sandra told a handy hint – to word things so that actors think that they came up with the idea. Sandra also advised not to get too bogged down in the actor’s technique

Analysis/ Reflection – Blow Up

In Michelangelo Antonioni’s 1966 film, ‘Blow Up’, the director would have had to coordinate the extensive movement and blocking of the actors within the set in conjunction with the camera movement, focus and framing as well as considering what it suggests to the audience. The most striking shot when considers the director’s abilities within the excerpt shown, was when the male actor lunged for the telephone. Extensive coordination and planning between the actor and the cameraperson would have had to be done.  The camera almost foreshadows the actor’s movement – with the camera quickly dashing across screen before the man lunges for the phone. Additionally, in the shot prior, the camera frames the male actor on the couch and shows the other seat before the female actor moves to sit next the male. The suggestive camerawork along with the actor’s movements implies that the process has been arranged by the director to imply such things. Another striking scene, that shows much expertise is when the female actor moves back and forth across the set. The camera pans with her movement however it gains focus on the male then back to the female whilst zooming in and out. I must say that the coordination of movement with the actors within the set along with the thorough camera technique is highly impressive on Antonino part.

Analysis/ Reflection Five – Points from Readings

The director and the actor. In Mackendrick, A. On film-making : an introduction to the craft of the director, (p. 179-194). London : Faber and Faber, 2004.

The author speaks of the controversial issue in the film industry on how much the actor should know of the director’s intent and technique. The author notes that as a general rule “The director is an interpretive artist and is often called upon (by the actor, no less) to be critical and self consciously analytical in his approach, full of verbal explanations and deep rooted thought” (179). Interestingly, the author speaks of the argument based around the actor’s awareness of the director’s intent and the actor loosing some of his/ her original thought, creatively and acting abilities because of this awareness.  I do believe that an actor has the right to have some insight into the director’s vision, however I also believe that the actor should focus on their acting and not be overly concerned with director’s focus. This is notable in many roles in the production process; for instance, the sound guy should not be too concerned with what the camera man is doing to a certain extent.


Developing a crew. In Rabiger, M. Directing : film techniques and aesthetics, (p. 385-400). 3rd ed. Boston : Focal Press, 2003.

I stumbled across this article when perusing for something completely different, however it provided insight into what some of our roles and responsibilities may be on the day of shooting. The article spoke of the importance of allocating crew members responsibilities as to the functionality of shooting. Additionally, the article advised that the PM and 1AD should manage queries before the director does to allow the director to focus entirely on the craftsmanship of the shot. This makes perfect sense however, I was unaware of some of the predetermined responsibilities for various crew members. For example, my role within my crew is 1AD and the article notes that I will be speaking with actors when the director is busy as a means on contingency.
Analysis/ reflection five – Lighting Lecture

In our week seven lecture on lighting, Robin provided the class with a run down on how to apply lighting as well as useful information on the lighting environment in relation to filming. An important note that I took away from the lecture was to know your lighting environment. This could include knowing the transit of the sun in relation to the shoot location as well as being aware of the lighting situation that the location entails. Robin also advised for us to “choose the relationship between the lighting situation and the subject”. Although applying lighting can give us some control over how the subject may appear, we also have the ability to select where to place the subject in comparison to the natural light. This also brings us back to Robin’s initial point – know the lighting situation at the shoot location.


After considering the information Robin provided, our group mapped out the transit of the sun at our location and came up with an assumption of when the sun would be at its strongest and where it would appear. This also provided us with an idea of what lighting complications may occur. From there, we arranged our shot schedule to avoid some of the difficulties we envisioned and also chose our lighting equipment around the lighting situation and affect of the sun’s transit on our shoot location and time frame.

Analysis/ reflection 4 – filming Lenny

Filming the Lenny in such a short time frame proved to be quite challenging. Although we took correct preparations in scouting a nearby location, sourcing actors, blocking and discussing shooting ideas, the filming didn’t seem to run as fluidly as we would of liked. However, it allowed us to become familiar with equipment and the overall production process. A problem that we came across on the day was that the memory card was full when we went to shoot. This meant that I spent ten minutes deleting files, which lowered our already minimal filming time. In future I will definitely check that there is space on the memory card. Another thing that I found interesting on the day was applying the ‘shoot to edit’ technique. Although our time was quite limited, our team experimented with various shots, locations, sound techniques etc.… which proved worthy when we came to the editing process.

To watch how Lenny turned out, click here.


Analysis/ reflection four – lighting

Robin’s week six lecture on lighting was technically informative as well as brought to light (no pun intended) things to consider when selecting and creating the lighting environment for our films. I found that a lot of the points Robin made were generally about applying your common sense – which was one of the main points that I took from the lecture.

One of the topics that also involves ‘applying your common sense’ was about knowing the transit of the sun (note: rises in the East and sets in the West and t curves northerly in winter in the Southern Hemisphere). Knowing the suns transit and the direction of our location allows us to predetermine the lighting situation at out filming location e.g. where the sun will be at 4:00pm. On that note, the suns positing also brings to mind continuity within the film – being one of the reasons why we light.

Interestingly, Robin spoke of how digital technology gives us the advantage to experiment and test lighting at our location before we go to production. In doing so, we should be able to decipher what lighting may assist us in achieving our desired result or perspective as well as preparing us for the lighting obstacles we may need to prepare for. The test may reveal that the location is strongly back light and that we may need boards to block light on the day.

Analysis/ reflection 3 – “Shoot to Edit”

I was unable to attend the week 3 lecture that focused on the ‘shoot to edit’ technique, however I have done some research as to some of the advantages the tactic can bring along with how to adapt the filming approach. Videoeditor.com describes the ‘shoot to edit’ technique to involve filming various shot sizes, panning, angles etc… as a means of having a selection of material when it comes to the editing process. Additionally, taking a range of shots can enhance a scene if not a lot was happening in it.


The article tells that shooting to edit involves thinking like an editor. The article also informs of the methodical practice of shooting to edit – stating that you are to focus on spatial elements. This would involve shooting all external scenes first, then internal, perhaps focusing on one side of the room and the angles and shots that could assist you in post production and then the additional side etc… Furthermore, the practice of shooting to edit allows for a larger creative selection when it comes to post production as well as more diverse shot variety in order to enhance the final product.


Work cited

Videomaker.com. 2014. Shoot to Show or to Edit. [ONLINE] Available at: http://www.videomaker.com/article/11087-shoot-to-show-or-to-edit. [Accessed 07 April 14].