Media Exhibition Reflection

As I stated in my intention post, my aim was to make a postcard and a poster for the exhibition. Now that it has past what I contributed to the event is as follows: A Poster, a postcard and a post with the embedded videos and a contextualized statement.

This turned out to be more than I internally anticipated to do but i guess it was for the benefit of the group so I didn’t really mind (that much). The postcard seemed to be a wasted effort on my part since the task was outsourced and by the time I was notified it had already been finished. The poster was finished and was part of my expected duties. The post with the embedded videos and a contextualized statement was a last minute addition since I was unable to get in touch with the rest of my group members so I took it upon myself to finish up these tasks. The videos had to be submitted to the media server at RMIT University and since I live a considerable distance away from the campus, so I decided to reach out to my group members but one was busy and I received no ward from the other. Therefore I opted to submit them via Google Drive in their original quality.

This turned out to be quite a grueling week for me since I had a number of tasks that I had not anticipated to be doing. The fact that it was also a busy week at work didn’t help things but at least it is now behind me and now I can finally enjoy a well deserved break

Exhibition Blog Post

card

What We Envisioned
Monochrome Cowboy initially looked at making a short film of 15-20 minutes in length. The initial concept was that subtitles on screen reveal a person’s true thoughts as our character’s mental state will slowly decline into a downwards spiral. The original vision was that we would have a male protagonist that is left in a state of disarray, as he waits for the return of his girlfriend after they had a fight in their home. After that ‘Jack’ heads to his local cinema and watches a foreign film. After sleeping thought most of it, ‘Jack’ wakes up with the ability to see people’s true feeling though subtitles. The conflict at the beginning served as a basis for all his insecurities as his mental state could only worsen from that point on. The narrative would eventually develop into an emotional climax where the girlfriend would return home and with his ability to see through the lies he would ask if she loved him and she replies “yes”.

What We Ended Up With
The end product was quite different than what we set out to do. Many factors contributed to this from actor availability to location scouting as instead we completed a short scene of the initial fight and a dream sequence. Being ambitious, we set out to complete a short film but we quickly came to realise that time was not on our side; therefore we opted to compete a well shot scene as a proof of concept. The character of ‘Jack’ has been gender swapped which was a positive change since many films have an insecure male as the lead. This change was due to actor unavailability and time constraints so Michelle, one of the group members of Monochrome Cowboy volunteered to play the role. There was a last minute notice that the location we were going to film at was no longer available so we had to improvise and ended up going to the gardens. The location went from being set in the bedroom of the unhappy couple to the scenic Botanical Gardens. It was a blessing in disguise as our frustrations wittered away at some of the sights the garden has to offer. We had always intended to include a dream sequence scene but it didn’t quite fit in the overall narrative but being a proof of concept and having the Botanical Gardens at our disposal we shot one. Since we all had to do our own cuts we were pleased at how different the scene turned out.

Presentation Poster

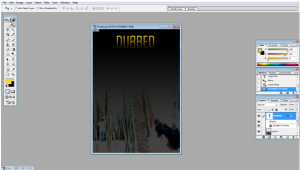
A3 Poster Jamie Cilia

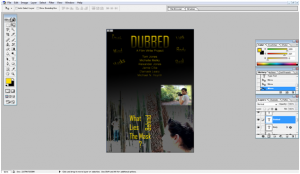
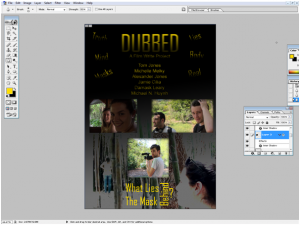
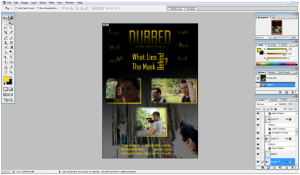
This is the Poster that I created for the exhibition. As you can probably tell I am using a very outdated version of Photoshop. This is because my laptop decided to self destruct on me so now I have to use the family computer which is basic at best. I took a great deal of effort to familiarise myself with a program that I had not touched in years. The interface was kind of similar but it was very much lacking in features so I was not exactly able to do what I had envisioned. Being pressed for time with other assignments and work didn’t help either but at least I managed to finish it and hopefully fulfilling the criteria required for this project.

Part 1

Part 2

Part 3

Part 4

Part 5

Statement of Intentions

For the exhibition day I intent to design the poster and postcard. This will aid my group in successfully completing Project Brief 5. I have also taken the role to write the contextualized statement for the website as well as including some of the videos that the group has made. I will also make myself available to aid others in my group that may be struggling. On the day I will be attending the presentations as well as aiding in anything that is required of me on the day.

Film Writing Post 20

Collaboration. In a perfect world everyone in a group would contribute equally by utilizing their skills in order to achieve a certain goal. This is not a perfect world but we try our best to do our fair share of work. This can ‘work’ can come in many shapes and form such being on time to group meetings, responding to any concerns that others have and making yourself available for production.

I can’t say that I have been actively involved in all aspects of the project as the ones that felt they are better suited for certain areas I was not would have made my involvement intrusive. The idea of having too many cooks in the kitchen is especially true when writing as if everyone writes about the same thing and each have their own interpretation, finding a compromise can be hard. So with this in mind giving feedback on what was written and having test footage of ideas from the scripts was really all there was to do in the pre-production phase.

As for the shoot itself we all outlined our availability so that we could find a suitable day for us to get together and film. A little last minute drama aside the shoot was completed relatively smoothly. Since we can’t all be Robert Rodriguez, a crew was necessary to film and with most of the group present; we had enough people in front and behind the camera to finish. I was responsible for monitoring the sound for the shoot and spot for the boom mic operator. I helped out with the location scouting while at the gardens which allowed us to shoot at some quite stunning locations.

In the editing phase we agreed that we will go and do our edit of the footage and share it with the rest of the group so we can determine which part work and ones don’t and now that I finished and exported my project I will share it with the group and see what we can put together. This way it allows us to craft our vision for what should be shown and how it should be shown. This is a liberating feeling as I can cut it the way it I want and share it with others. It will be interesting what we will craft as it would seem we all have a unique take on what we have shot.

https://drive.google.com/a/student.rmit.edu.au/file/d/0B4iXF6gqByUoRGdwbk1vbEMyZ2c/view

(Use the Pop Out feature for better quality)

Film Writing Post 19

Keyboard Short Cuts

I decided to do the colour grading exercise first just to see if I can find a short cut that will make my life easier when editing later on. That didn’t take long since I’m using an older laptop than most, these days it doesn’t quite keep up with the editing software I run on it. This forces me to render very often because if I don’t I will be watching the clip frame by frame. So I looked up ways to counter this and found out that I need to render these sequences so that they can run smoother. When I go on the sequence tab to render I noticed it had the short cut “enter” right next to the render function. This saves me a lot of time considering I render so often, which will make the time until I get a new laptop all the more bearable.

Another keyboard short cut that I found useful was the one to maximise frame with a simple press of the shift and the grave accent key. This saves a lot of time since I don’t have to move my mouse to the frame and bring down the options and click “maximise frame”. This is especially useful when wanting to take a closer look at the work I have been working on. There I noticed that there is some disparity between what I see on the small preview screen and the bigger one so I have to keep that in mind when editing in the future since the bigger one is closer to the final product than the smaller one. This will hopefully mean that the products I produce from now on will be closer to what I envision when I’m editing.

Film Writing Post 18

Colour Grading

Cold Washout
For this clip I used the Colour Balance tool to give the clip a colder look to it by emphasizing the colour blue while reducing the warmer red colour. I also went on the tool Brightness and Contrast to increase the saturation thereby increasing the intensity of the shadows making the clip that more menacing and eerie. With all this there is a clear tonal change to the atmosphere of the original clip since it has a heightened sense tension and bleakness. This is useful to convey a certain tone without really explicitly telling the audience what the clip was about.

Warm Over Saturation
For this one I thought I would experiment with doing the same process as the Cold Wash Out but with a warmer colour and what I ended up with was a strange tone that gave off a very unsettling feeling. It almost attempts to put the audience at ease with the warm colour as well as warn them on an impending danger.

Warm Over Exposure
In this clip I used the tool Fast Colour Corrector to see what a more simplified version to adjust colour gain compares to the more complex ones. As it turns out it allows you to focus on a certain colour using a wheel. This is a very easy way to hone in what colour combination I could use but it is very basic. I had to add the Brightness and Contrast tool just to make the clip a bit more appealing but I can see the use of this tool since it is good for experimenting with colour. The end result was that the clip resembles the sepia tone, giving the impression that it’s either a flashback or an event in the past.

https://drive.google.com/a/student.rmit.edu.au/file/d/0B4iXF6gqByUoOC01Tk5DUG8zbUE/view

(Use Pop Out feature for better quality)

Film Writing Post 17

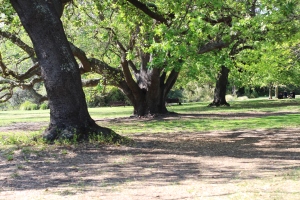
Today we filmed the footage for our presentation at the Royal Botanical Gardens. This was a very last minute change since we were unable to secure our previous location. As it turns out it was a blessing in disguise as the Royal Botanical Gardens was very pleasing in terms of audio and aesthetics, with many locations that inspired us. It was a fest for the eyes and ears as we were spoiled for choice for locations and I believe we could have spent all day there just looking around but since we are on such a tight time schedule we had to buckle down and get shooting.

As the wind blew, the leaves of various kinds of trees slowly glided to the earth which was accompanied with the sound of a nearby ratting of a bamboo patch. This is just a sample of the amazing sights and sounds of these gardens as I was told previously that it is an ideal location to film but never actually got to. With what I saw today I can say with confidence that this will not be the last shoot I will be part of at the Royal Botanical Gardens.

Besides being a relatively windy day and the temperature climbing to the mid thirties it was a relatively smooth shoot. There were the occasional passersby stepping into frame at the wrong time and fining each other in such a vast place was challenging but once we got together and planned our shots, I feel that we shot some good footage. There is of course the argument that you can’t judge your footage until the post-production phase and I agree with it. With that said, I am mildly optimistic that we captured what we set out to do. We faced many challenges throughout the development if this project so it is a great relief to see it materialize.

Film Writing Post 16

Today in class we focused on sound, more specifically the use of a production sound mixer. I had recorded sound in previous shoots but I had always used the Zoom H4n to record. Not that the Zoom has not served me well as it is a simple and reliable device but with a production sound mixer you have so much more control over the audio you record.

What I always found frustrating with the Zoom was the method you can adjust gain as you have to press a button but on the mixer you calibrate the gain with one knob which can be pushed in and then fine tune the gain during the shoot to compensate for changing levels with another. I like the fact that there are two levels of audio gain so that you can be more precise when you slightly alter the levels during the shoot, which can make a huge difference in the editing phase.
The rule that whoever is wearing the headphones has to also have the mixer is sound advice as the mixer is capable to ear-damaging levels. It may come across as common sense but there are instances where someone might forget even the basics safety rules so it was a good refresher on the subject.

What was also interesting was the point of having the most important subject in input 1 as the example of an interview was given. Some interviewers have the bad habit of saying “mhm” and “aha” while the interviewee is talking so if a sound designer wants to eliminate them they could do it without any real hassle. This will make the interview better as a whole as the most important subject between the interviewer and interviewee is the interviewee since it’s not much of an interview without them.