Re: Worries for Editing

I thought this might be a good opportunity to address some of the worries I had going into editing about the way we conducted our shoot.

The main concerns being the:
– quality of the footage with the camera that we were using (focus)
– The quality of the audio
– Being able to easily navigate to audio whilst editing

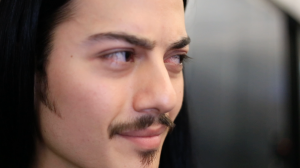
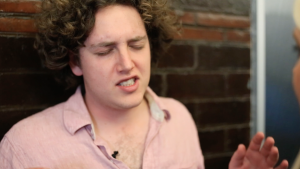
The footage came out really well! for the most part the footage was definitely usable, there were clips that were soft or completely out of focus but we took enough takes for there to be at least one usable/workable shot. There are certain instances where the focusing couldn’t be helped because it was such a shallow depth of field, like in the image below, only half of “Ted” and “Vincent’s” face is in focus.


Screen Shot 2015-10-23 at 7.13.19 PM Screen Shot 2015-10-23 at 7.12.53 PM


The audio was a big problem! It turns out that the lapel microphones were very faulty and wouldn’t record anything! so there are a few files of nothing mixed in with the rest; the only usable audio came from the boom. Luckily they were all grouped so one take was in one folder which had 4 audio tracks in them. This did make it marginally easier to sort through the audio tracks however it was still a hassle opening up the audio tracks to listen for the markers instead of being able to just read it on the still image of the footage. Alas we didn’t do that, next time I will try and be more adamant that we need to add the audio roll to the marker!

This isn’t the end of the world though and we seem to be coping well enough so I shall continue to soldier on.

Editing The Trailer

So we decided as a group to go the way we’ve alway gone when dividing up tasks and that was for every body to take responsibility for their own genre. As has been noted several times before, I don’t have a genre that I’m looking after so it made sense that I was to cut together a trailer to show off the series as a whole. Originally I thought it would be better to wait for everyone else to finish their editing, that way I could use their already edited footage, keeping the correct colour and the correct mood for the genre. Very quickly I realised that this would leave me at a big disadvantage as I was totally dependant on everyone else finishing theirs and giving me enough time. So I decided to create a trailer from scratch.

We had gotten a class on how to set out your editing and workspace so I tried to keep to that as much as possible. It seemed like a lot of ground work for some peace of mind but I can understand the reasoning behind it. We were to create new sequence every time we wanted to do something different, that way we would have a record of where we came from. I have to admit it is hard to keep it in your mind, its a bit like clicking the save button, you never can remember it until its too late.

My first step isn’t very exciting so it’s not worth much of a post but here it is anyway. I set up a sequence entitled trailer footage which was all the unedited shots I though were good enough to make it into the trailer. I ended up with about 20 minutes of footage which was a lot better than the hour and a half that we had. I chose these shots because they looked good, not because they were important to the story. There is, however, one piece of dialogue I will keep which was filmed on the second day which is the character Jack explaining to camera why they are here, basically telling the plot points of the series. My plan, as it stands at the moment is use that dialogue under the other images to create an exciting and insightful trailer.

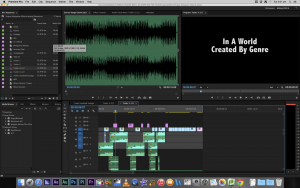
You can see my first attempts at editing a trailer below:


Screen Shot 2015-10-20 at 3.01.29 pm

Editing Exercise

So we have finished out filming and it looks really good, really proud of the shots and everyone involved! in our consult we were asked to do a colour correction exercise to start us off. Even though I do love editing, I use Final Cut Pro instead of the program that we were asked to use which is Premiere Pro. Although they’re similar the small differences have been enough to trip me up and is just more time consuming.  Although the tools are different I figured the outcome should be the same so with that in mind and my past experience I set to work on colour correcting the clip that I chose. I didn’t choose the clip for any other reason than I liked it.

In the video you’ll see 4 clips each with different colouring, I tried not to be too gentle with the colour so that you could really see the difference and it would be easier what kind of mood a certain colour gives to the shot.

The first clip is is the footage that has come straight out of the DSLR – no colour correction.
(because its a DSLR the image is already compressed which means it looks good from the start but its difficult to edit the image because there isn’t as much information and range – worth noting when watching the clips)

The second clip I was going for a darker horror vibe, even though the dialogue doesn’t suit the genre I think with this colouring and the appropriate music this shot could come out very sinister!

The third clip is green, because I wanted to try something different, however upon looking at this shot I can see why not many films use green as their filter because it looks pretty awful. I can see how you might use it to your advantage, if a character was meant to be looking or feeling sick.

The final clip is almost a sepia looking filter, the cliche would be an old western but I feel that the fairly flat colouring could lend itself well to the noir genre that we’re exploring as it would let the shadows stand out more than the original footage would.


Worries going into Editing

This was originally going in my previous post about the first day of production however it was getting a bit too long and I feel that this could be an interesting post on its own. As I mentioned previous there are things that i’ve picked up during my experience of shooting, things that you can only really learn or appreciate once you’ve gone through it.

First thing is sound:
I wasn’t too sure on the whole sound set up we had. Because we were shooting on a DSLR we had to record the sound separately, which is fine, as long as your prepared for it. By this I mean you need to make it easy for yourself in post production by writing the roll or the file number on the clapper so that when you’re looking at the footage you can easily navigate to the correct audio file without having to go through and listen to them all, which you can imagine is pretty time consuming (and yes I found this out the hard way, editing my own footage without listing the roll on the clapper just meant I had to open up and listen to every clip, it was a nightmare!). And I did mention that at the start of our shoot, I said that it would make life so much easier, however after a few shots in in turned out we were writing down the wrong number for the roll, I insisted finding the right roll and writing it down on the clapper however everyone seemed to think that it would be fine and we can deal with it later. The said as long as it was in order we could find it pretty easily, which I hope is true but I have a suspicion that it might not, it might become this arduous task that could’ve been avoided.

The other problem I had with sound were the microphones that we were using, we had lapel mic’s on all of the actors plus a boom plus an omni on the actual recorder, we were using a H6 I think. In my opinion: we could’ve done  without the lapel mic’s, I would’ve just had a boom mic and the omni as a back up. A few problems that I’ve found with Lapel mic’s which became evident on the shoot were they always get in the way, it’s hard to shoot, especially with the actors and camera moving around so much, without showing the mic on the actor. The next thing is because they’re wireless they’re prone to interference which also became evident on our shoot. I think we went overkill with the microphones that we used, I know it doesn’t hurt having them because you have backups but it just makes thing that more difficult when you put it on top of the problem I mentioned about not writing the role down and having to listen to all the audio clips in post, the more clips you record the more you have to syphon through.

The other problem I wanted to mentioned was the camera:
The camera that we decided to use for our shoot was a DSLR Canon D6. I don’t have a problem shooting on a DSLR, in fact that’s what I normally use however there are things I’ve learned to look out for when using one. I kind of new the problems that we might have as soon as we picked up the equipment. First of all, if your shooting hand held (which was one of our major stylistic elements) on a DSLR you need to mount it to a rig, anything like a shoulder rig or glide cam, the camera is two small and it’s unstable when holding it by the body with your hands, there is just too much movement. evidently I feel like a lot of our shots are going to be extremely shaky, not sure how much of it we can fix in post.
The other thing with DSLR’s is their lenses create a very shallow depth of field. The lens that we were using was a 50mm static lens at f/1.4 or 1.8, the problem with this is it makes it really difficult to keep a subject in focus when their moving back an forwards in frame. For instance when our character Vincent was stumbling down the hallway, if the focus wasn’t pulled correctly then the whole shot would be wasted, even if everything else went well. A few ways I would suggest to fix this problem is to attach a follow focus to the lens, this means you can actually mark out the focus pull, increasing you strike rate exponentially. Other ways that would’ve helped is an external monitor: this helps because you can see the screen more clearer as its bigger than the small on on the screen or in the view finder and most external monitors have zebra stripes for peaking and focus.

Anyway, these are just a few things that I noticed during our shoot which might come bach to haunt us in post production. but I guess we will wait and see!
First Day of Production

So the time had finally come to shoot this thing, and I couldn’t be happier! Even though it was interesting to work on the pre-production and it was a real learning experience for me, the practical side is where I hit my stride and where I was finally able to give some back to the group. The creative writers in our group made it clear that they weren’t the most comfortable behind a camera or doing anything technical so the other media students and I made sure they knew what they were doing by the end of the day.

As you might have seen in the call sheet that I had put together we all took it in turn of being various things, depending on the number of crew we had at a time we would have a Director, AD, cinematographer, boom operator and light operator. By the end of the shoot we all had done at least one of each. I think this was the best way to do it because it allowed everyone to have a taste for each individual job and also allowed us media students to lead by example.

In regards to the actual shooting I think it went fairly well! we had a slight problem with an actor not showing up which we managed to overcome by having one of our own step in but besides that there were no major problems. I mentioned in a previous post that it would be interesting to see how I would go running with a call sheet instead of running on the fly: to be honest, I didn’t find it much of a help. It was good in the sense that we didn’t leave anything out because we new exactly what we needed to film and it made sure that we each gave everyone an equal turn which is fair in this context but when it comes to actually being in the industry you don’t swap around your jobs every hour. I guess it might have been the way that I wrote out the call sheet, I tended to block out hour lots where we could rehearse and film a specific genre but besides stating that every other decision was thought up right there and then, which is how I usually work. I feel, if I had the opportunity again, I would take one script and put it through the whole pre-production phase, doing things like making a shot list and drawing up a story board to create something very rigid that you have to stick to. unfortunately this was not the case and I never got that epiphany that I was hoping for, something to prove to me that it was worth doing so much planning. I guess the only thing that I found benefit in is organising the crew and cast to shoot around their other schedules of work and life, although you’d like to think that if they were in the industry and getting paid for it then you wouldn’t need to worry about that anyway.

Anyway, all in all it was a great day of shooting, I managed to bring some skills to the team which I may have been lacking in the pre-production stage, nifty tricks that I had learned from my other shoots, only things that you can really learn once you’ve been through them before, like using a swivel chair for a dolly shot.